BBX Tips & Tricks: Building the BBX the Tamiya America way.
The BBX is Tamiya’s all-new off-road buggy designed to excite radio control fans who love to build kits including those of us at Tamiya America! Here’s a quick overview of the BBX, where it lies within the Tamiya Off-Road buggy product line-up and some helpful tips.
The BBX is a kit based on the all-new BB-01 chassis which requires hobbyists to select and supply their radio and electronics of choice along with their motor and battery of choice. Compared to our iconic entry-level buggies like the Grass Hooper, Hornet, Buggy Champ, and Wild One, the BBX incorporates the same nostalgic Tamiya look of a classic 1980’s dune buggy with the specs and features that are demanded by today’s experienced hobbyists.
The BBX uses hex hardware screws for part attachment and advanced plastics for its parts makeup. Specifically, the BB-01 chassis employs PA-GF plastics for all its main parts components. For the knowledge thirsty, PA-GF plastics stand for Glass Filled Polyamide. The main characteristics of glass fiber reinforced polyamides are remarkably high rigidity, high mechanical strength, a high degree of hardness and toughness, as well as high creep strength. They also have remarkably high dimensional stability, good fatigue strength and high mechanical damping properties. In comparison, our entry level kits use ABS plastic to keep the cost of the kit at the entry level price point. With that in mind, we’ll take you on our journey and tell you how we set up our BBX to take in dirt lots and parks. Not only did we build the BBX, but we added what we consider to be key Hop-Up Option parts that will provide the most durability during your park and dirt lot running.
What you’ll need:
When you purchase your brand new BBX kit you get all the necessary parts and hardware to build the kit. You will need the following items to complete the kit.
-
Two-channel radio system: You will need a two-channel radio to control the BBX. For our build we selected the FUTABA 4PM radio system. It’s a capable mid-level radio system that provides plenty of options to tune the radio to your liking. It’s also a radio that you can easily use for various Tamiya vehicles as your RC garage grows! An alternate radio that you may consider is the Futaba 3PV. It has all the features you’ll need to control your BBX, but at a lower price point. Make sure to also check with your hobby dealer as they may have a recommended radio system that they like. There’s a lot of brands to choose from.
-
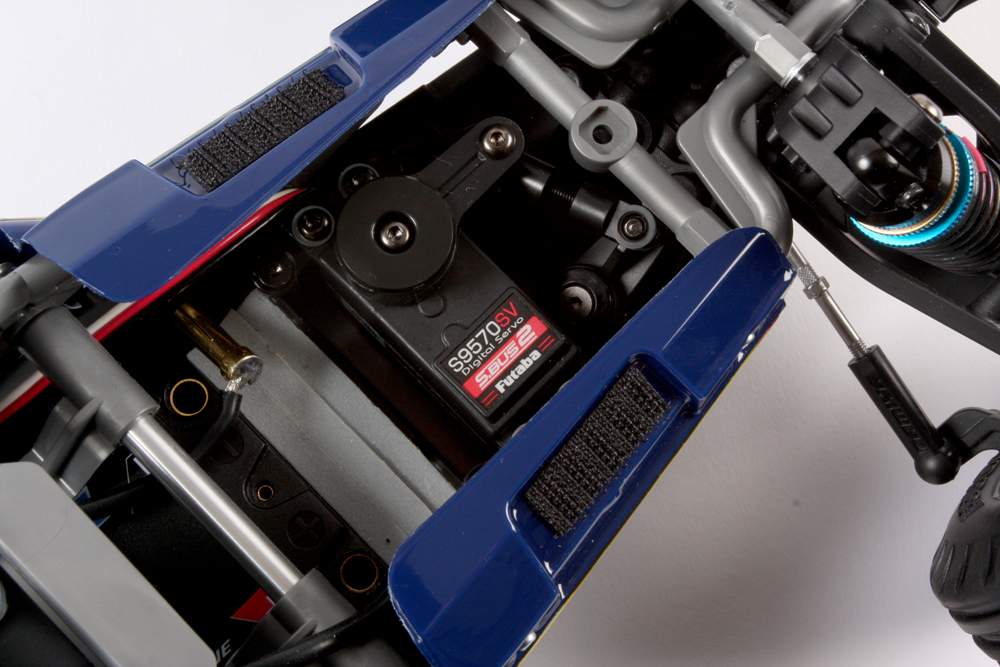
Steering Servo: The BBX requires a low-profile servo for steering duties. Low-Profile servos are becoming more commonly used in today’s Tamiya RC chassis platforms as they are smaller in size from a depth perspective which frees up room in the chassis to better position weight distribution and balance. For our build we selected the Futaba S9570SV. This servo provides .08 millisecond response time, and 111.1 ounces of torque. The .08 response time allows us to quickly maneuver the BBX and the 111.1 ounces of torque allow us to easily throw the BBX around any off-road driving situation with no stress to the servo itself.
-
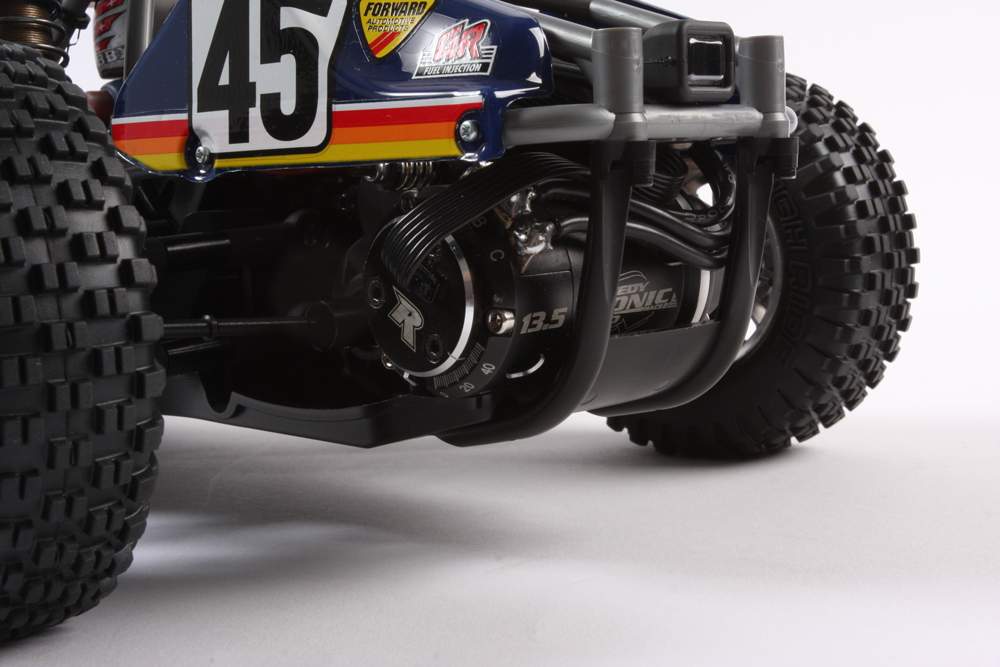
Motor: The BB-01 chassis uses a highly capable transmission which incorporates a ball diff gear, counter gear, and idler. It manages 540 size motors including the brushless type. For our build, we chose a 13.5 Reedy brushless motor, which provides plenty of power to tackle any park field or dirt lot. The kit includes 18-tooth pinion gear, but we elected to gear our BBX to the tallest ratio permitted by the included spur gear, which is an 86-tooth spur with 27-tooth 48-pitch pinion. 8:28 to 1 is the final drive ratio with this combination and it provides plenty of zip and top speed!
-
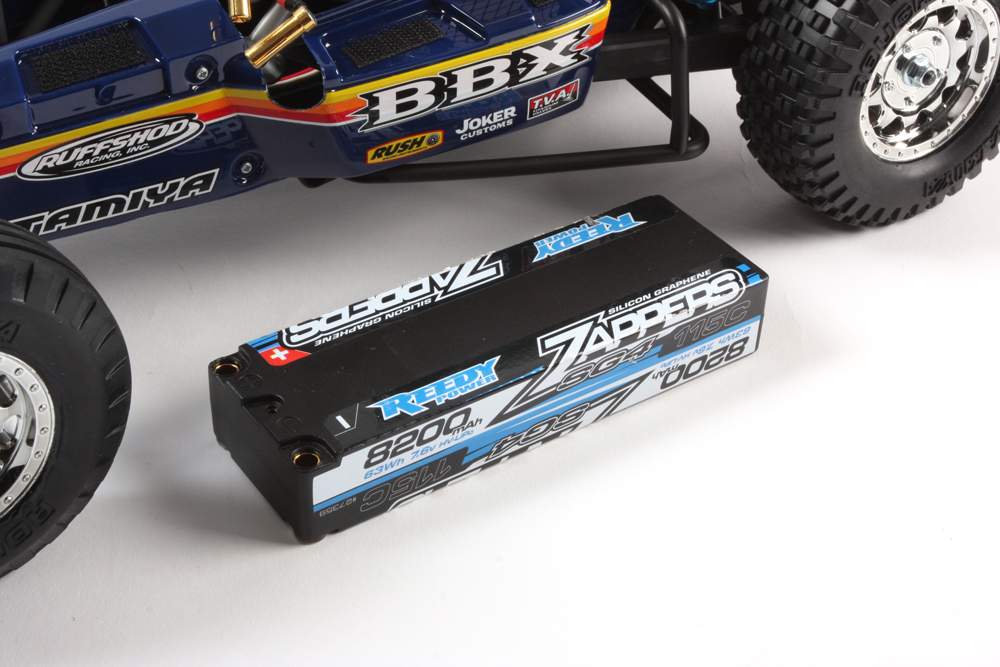
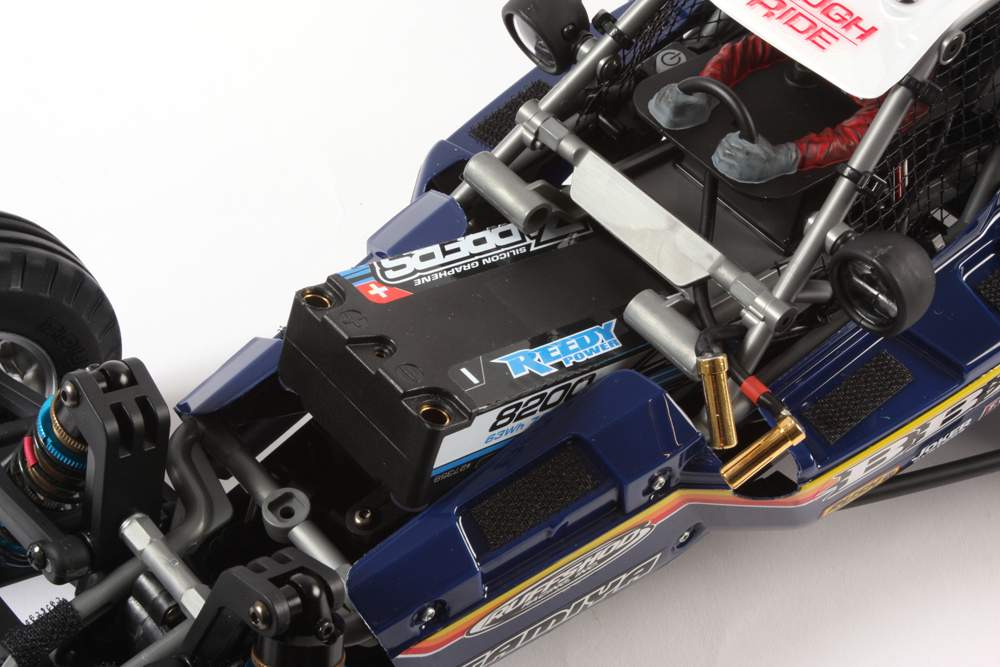
Battery: The BB-01 chassis battery compartment is large enough to fit modern-day battery packs including 2S LiPo. For our build we elected to install the biggest capacity battery we could find and that was the REEDY SG4 Zapper 8200mAh 63Wh 7.6volt HV-LiPo. If you are new to R/C battery specs, the 8200mAh stands for capacity. The larger this number the more capacity the battery can hold. For reference, we were able to drive the BBX for 50 minutes on a single charge with the Reedy 13.5 brushless motor and 27-tooth pinion! Fun Fact: In the late 1980’s and early 90’s battery capacity consisted of battery packs with 1200mAh capacity. You were lucky to get five minutes of running time before needing to recharge the battery. To say the least, electric Tamiya R/C enjoyment has come a long way! NOTE: We don’t recommend running any electric R/C vehicle for a continuous fifty minutes. You run the risk of overheating your motor and ESC, so make sure to monitor your car when using large capacity 2S LiPo battery packs.
-
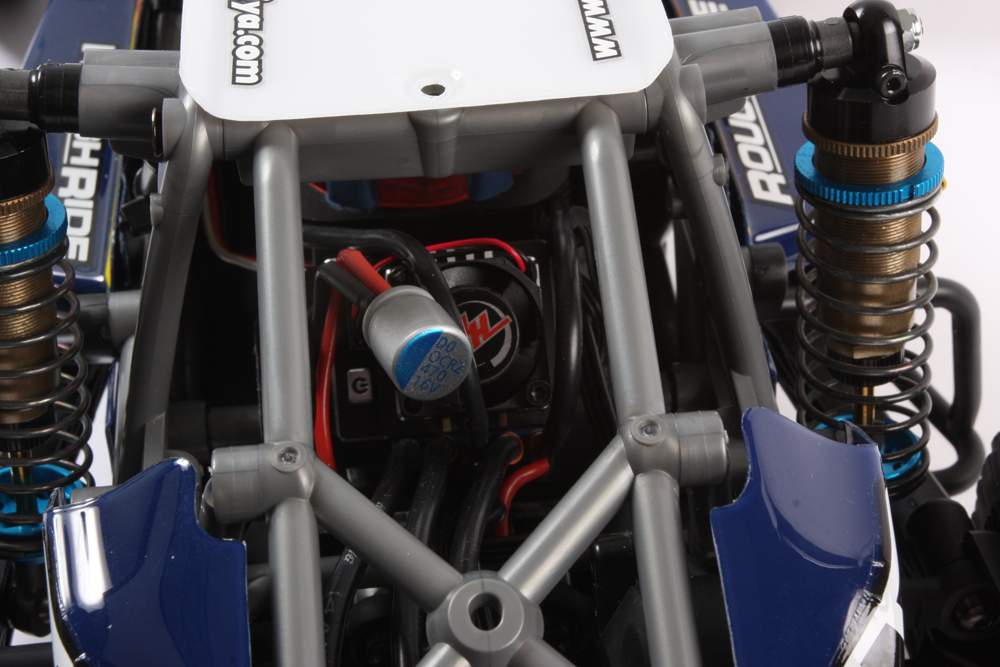
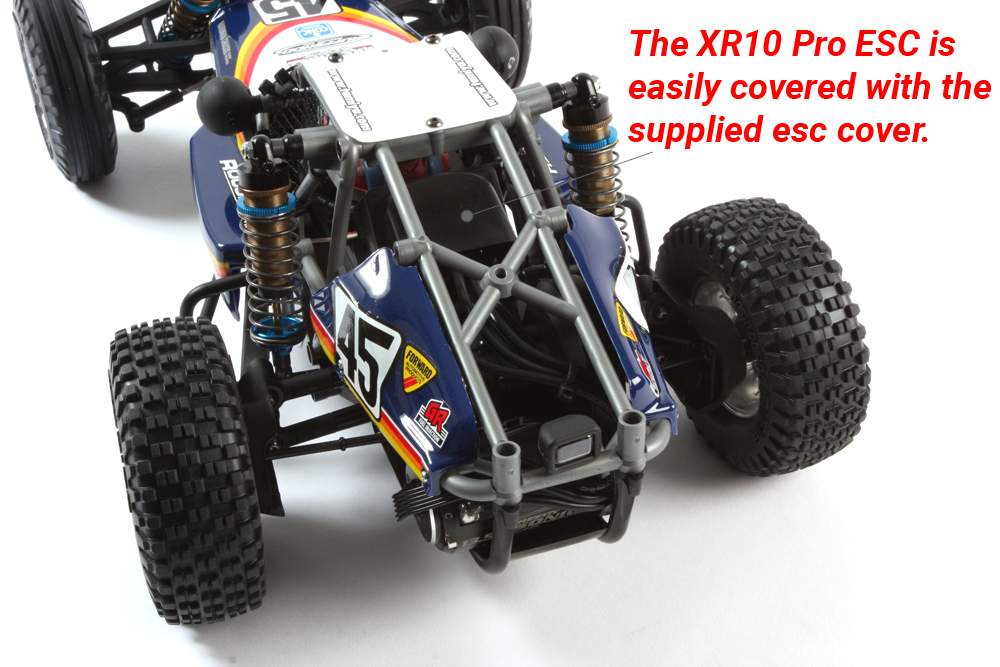
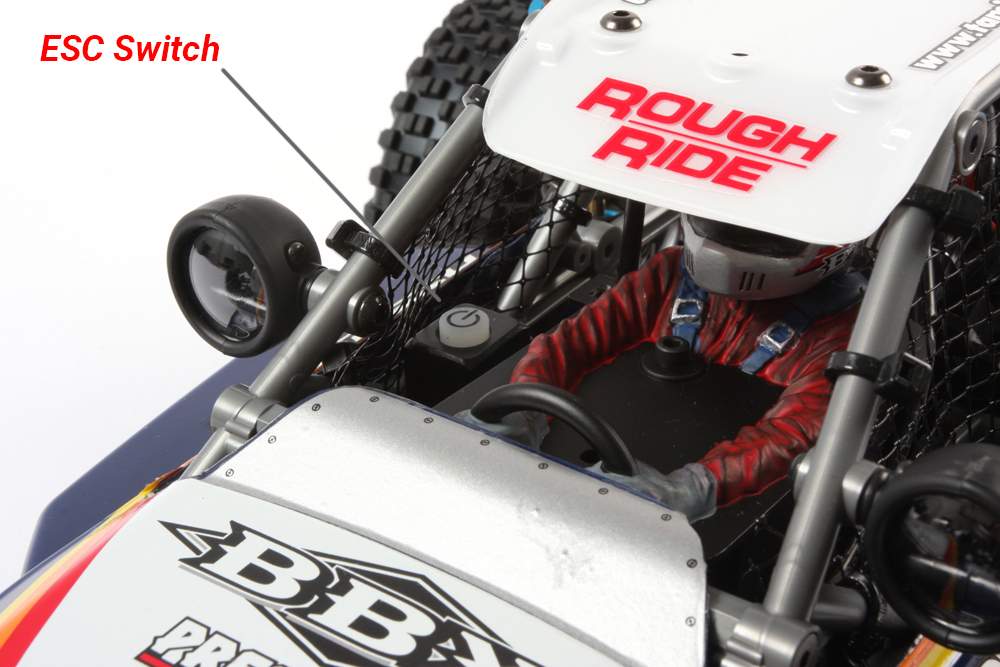
Electronic Speed Control: Speed controls come in all shapes and sizes. For our build, we elected to use the small footprint Hobbywing XR10 PRO ESC. This ESC fits the BB-01 ESC compartment with room to spare. The included ESC fan fits within the compartment, and you can still use the ESC compartment cover as seen on step 24 of the instruction manual! We also like that the XR10 PRO ESC gives you the option to use the on board on/off button or the included external add on switch. We elected to use the external switch option because we can locate the switch on the switch deck as seen on step 22 of the BBX instruction manual.
Hop-Up Options
The BBX is a high-performance assembly kit. It includes a lot of pro-level components that make the buggy a capable off-roader right out of the box. But, as any R/C fan will understand, things can always be optioned out to be even better! That is why we offer a wide selection of Hop-Up Options that will let you customize your BBX to whatever high-spec you want.
The options below are the items we installed right out of the gate because we just can’t help ourselves. We also explain what the benefits are.
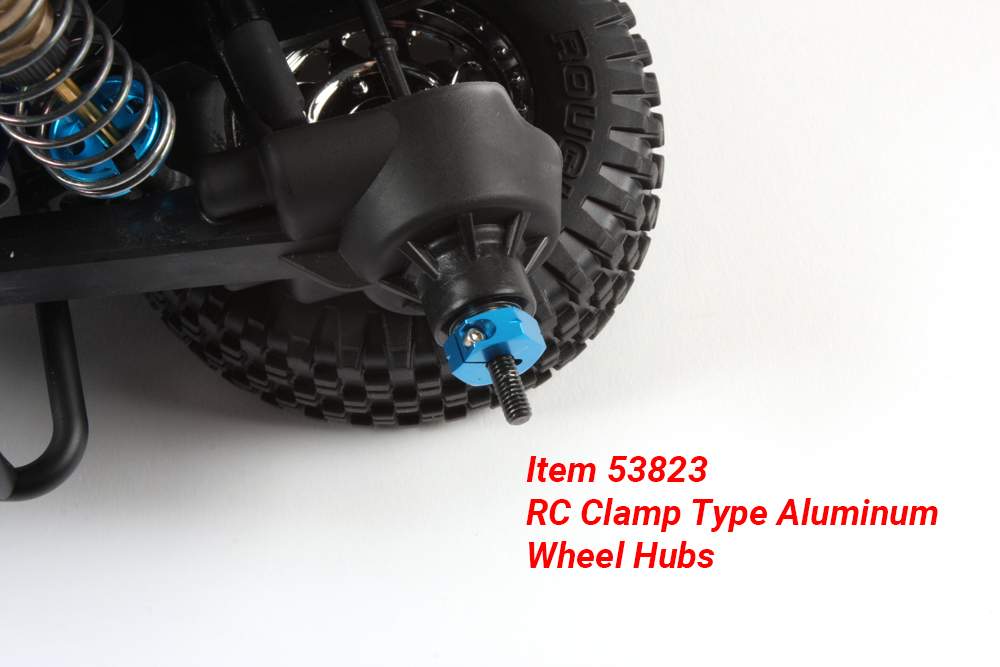
Item 53823 RC Clamp Type Aluminum Wheel Hubs: This option replaces the plastic hex wheel hubs. The benefit of using the aluminum hub over the plastic version is that it secures itself to the drive pin with a small hex head screw, so you never have to worry about the hex hub falling out when maintaining your vehicle. It’s an ease of maintenance thing that we really like.
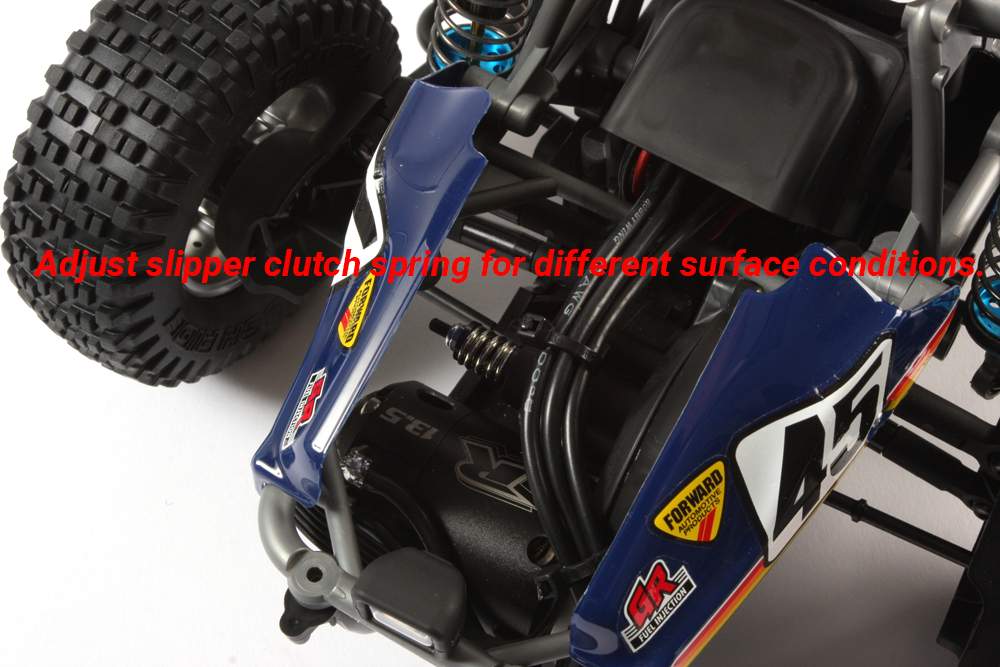
Item 22071 RC BB-01 Slipper Clutch Set: This option is necessary if you plan to put in a high-power motor such as the 13.5 motor that we installed. It’s also a must if you plan to drive the BBX on loose to loamy dirt with a motor with high power. So, what is a slipper clutch and how does it work? The slipper clutch is a device that’s installed into the existing drivetrain as it replaces the standard top shaft and gear. The set includes friction pads that sandwich the main spur gear. The friction pads “friction” can be adjusted by tightening or loosening the included spring tensioner. Once adjusted correctly the slipper can help protect the drivetrain from sudden surges, typically when landing jumps, and help tune the vehicle on slippery surfaces. When the slipper is adjusted correctly, your BBX will accelerate quickly. If set too loose, your BBX drivetrain will slip for a second or two before the friction pads engage to propel your vehicle forward. It’s a great tuning feature that will help get the most out of your BBX.
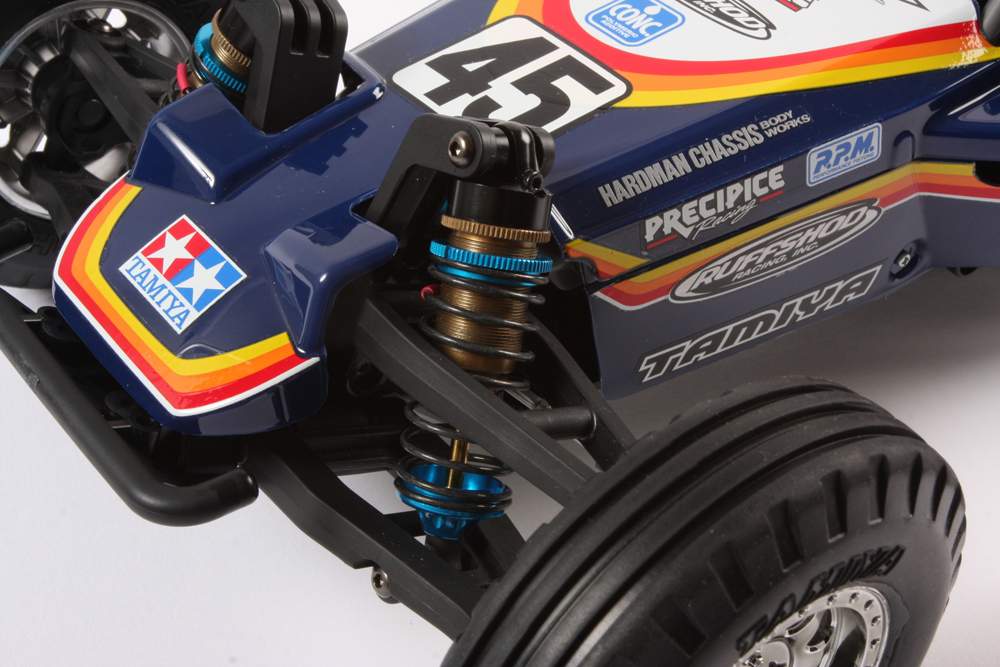
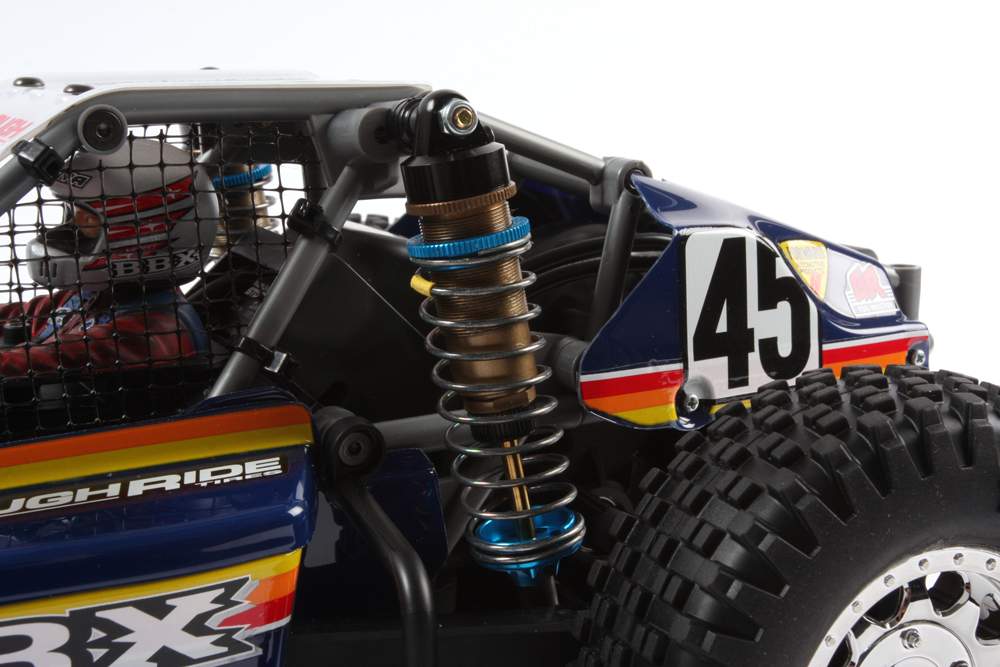
Items 54504 & 54505 RC Buggy Big Bore Damper Aeration Type (Front & Rear): The included Tamiya Aeration type dampers work well. They provide essential shock absorption on whatever off-road surfaces you plan to drive the BBX on. However, what if we were to tell you that our top-of-the-line Aeration Shocks from the TRF201 are compatible with the BB-01 chassis!? Well, they are! Not only do these shocks fit the BB-01 chassis, but they can also be used on our TD4 (Super Avante) and TD2 (Super Astute). So, why use them? Simply put, we installed these on the BB-01 because they make the BBX look cool! However, there are some advantages for our customers who may want to use them as well. The cylinders have a high lubrication coating, and the shock bodies are made of hard-anodized aluminum. This feature helps the shock piston move up and down with greater ease and with less wear. The shock shafts are titanium coated which further enhances the overall smoothness of the shock. Compared to the standard aeration damper cylinders, the cylinder on the option shocks has an inner diameter of 12mm, which is 2mm wider than standard 10mm Buggy Aeration Dampers used in the kit. As a result, it can hold 40% more oil and that means less wear and tear on the vehicle due to the increased dampening volume! Additionally, the cylinders have threaded bodies that allow the spring tensioner to be finely adjusted by simply turning the spring tensioner in small increments. In contrast, the standard aeration damper springs are adjusted with a plastic adjuster with a screw that secures its position in place on the shock body. Lastly, the BBX will absorb bigger ruts and undulation, and handle jump landings better from off-road running with less bounce because you have more oil capacity in the shocks. Note: You will need to purchase springs for these shock sets separately. Items: 54507 RC Big Bore Damper Spring Set Aeration Type Front & 54508 RC Big Bore Damper Spring Set Aeration Type Rear. These sets include three different spring rates in which you can play with to tune your BBX.
Item 54993 RC Aluminum Damper Set: This shock set is an alternative to the higher end TRF Big Bore shocks. The set includes all four shocks with threaded aluminum shock bodies and a set of springs. The main difference between this set and the standard aeration shocks is the way the shocks handle dampening and how the shock is built. In aeration shocks there is no shock bladder inside the cylinder. You simply fill the cylinder with oil then bleed the shock according to the instructions. With this aluminum shock set it uses a bladder on top of the cylinder. The use of a bladder makes it easier to achieve the same dampening level when building all four shocks. Additionally, bladder shocks keep dampening consistent for a longer period between maintenance intervals. With aeration shocks, bleeding consistency can be tricky, so there’s a little more trial and error. We think most of our customers will benefit from this set for everyday running.
There are more option parts that you can use to fine tune your BBX, but the above parts are what we consider the best starting point to maximize the performance of this exciting new buggy! In future Blog Posts we’ll get into those other parts, but in the meantime check out our helpful hints to maximize your running enjoyment. FULL LIST OF BBX HOP-UP OPTIONS
Helpful build tips:
-
Make sure to carefully read over the instructions! You’d be surprised how many tips and notes are in the instructions that make assembling certain sections of the car a lot easier. The specific tips called out in the manual include steps; 2 (The DIFFERNTIAL assembly), 8 (snapping metal suspension balls unto plastic adjuster), 15 & 25 (snapping metal suspension balls onto suspension arms), and 30 (Widening front shock tower screw holes)
-
In step 41, we suggest you position the 5x.5mm spacers that are fitted on the universal shafts in the called out alternate position. The alternate position is shown at the bottom of page 21 of the instruction manual.
-
On step 6 you will notice a thin light green motor plate that’s sandwiched between the motor and the aluminum motor plate. Many of our customers elect not to use it in kits that supply it. We suggest you do for the BBX! The reason is because most motors, especially brushless motors, have venting slots as part of the cylindrical design. Debris has the potential of entering the vent then exiting from the back of the motor. If you don’t use the green motor plate, fine sand or dirt may enter the gearbox portion that houses the main spur and pinion gear through the motors vent holes. By using the green motor plate, you reduce this possibility greatly.
-
Whether you use the included aeration dampers or any of the Hop-Up Option shock dampers, we suggest adding 3 rubber O-rings on the outside portion of the shock shaft on the rear shock dampers. The BBX has long suspension travel that makes it so much fun to drive on rough terrain. However, if you encounter a deep enough rut, or run alongside a high banked berm, it’s possible for the compression stroke on the up-travel stroke to cause enough angle to the universal shafts that it will pop out of the drive joint. By adding the three O-rings they essentially act like a bump stop that prevents the up travel from exceeding extreme angles with the universal shaft.

-
Spare Wheels: The BBX uses wheels that are made of nylon plastic. Nylon plastic is used on high-performance off-road RC cars because they have flex characteristics that absorb the rigors of off-road running. In contrast, our high-performance on-road cars use ABS plastic wheels because flex is not needed or desired when driving on smooth surfaces. Customers will notice that the BBX wheels and any of our 1/10 scale touring car wheels are the same dimensions. With that said: DO NOT USE TAMIYA ON-ROAD WHEELS ON THE BBX! They will easily break! Only use the official BBX spare part wheels or any nylon wheels that are offered in the future.
We hope you’ve found this blog post article useful. The non-Tamiya items needed to finish our BBX build like the radio gear, ESC, battery and motor are the items that we believe would maximize the performance of our buggy. The hobby world is full of wonderful brands and with different price points and features. We encourage you to do use what best fits your budget and brand preference when enjoying Tamiya R/C vehicles.
We will be posting updates as we discover new tips and tricks to get the most out of your new BBX off-road buggy!